
In product development cycles where tactile quality, color differentiation, and assembly reduction are priorities, two-shot injection molding offers a tightly integrated solution. This technique is no longer a niche—it’s rapidly becoming a standard in industries like automotive, medical devices, and consumer electronics where the demand for dual-material plastic parts is rising.
This article walks you through everything an engineer or sourcing manager needs to know—covering the core process, compatible materials, key design constraints, how it differs from overmolding, and how to decide if it’s the right manufacturing method for your project.
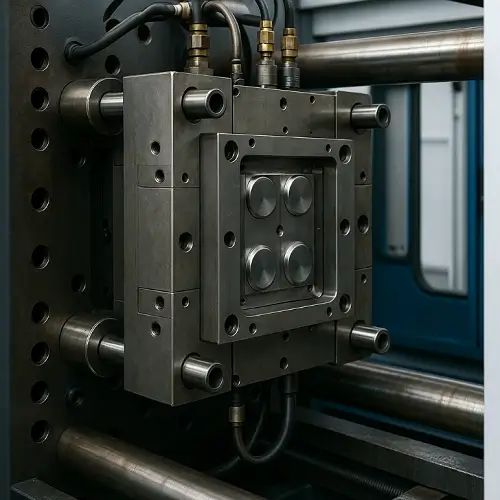
What is Two-shot Injection Molding?
Two-shot injection molding, also called two-color molding or dual-shot molding, refers to a single molding cycle in which two different plastic resins—or two colors of the same resin—are injected in sequence to form one cohesive part. This is done within the same mold and on the same machine, using a rotating core, index plate, or transfer mechanism to reposition the partially molded component between shots.
Unlike overmolding, which may require manual or robotic transfer, two-shot molding is fully automated, enabling superior material bonding, tight dimensional tolerances, and reduced assembly steps.
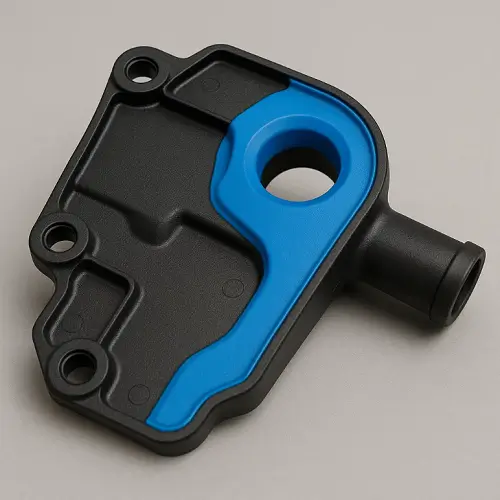
How Two-Shot Injection Molding Works
The process runs in two tightly coordinated stages—both inside the same mold, same machine, same cycle. No manual transfers, no second setups.
First Shot
The first material, typically a rigid thermoplastic like PC or PA66, gets injected into the core cavity to form the structural backbone of the part. This is where critical features like bosses, snap-fits, or load-bearing ribs are formed.
Indexing or Mold Rotation
Once the first shot sets enough to hold its shape, the mold either rotates or slides the part into position for the second injection. This re-alignment is precise—just a fraction off, and your second shot could flash or misregister. That’s why good mold design here is non-negotiable.
Second Shot
The second material—usually a softer elastomer (like TPE) or a second-color rigid resin—is injected over or alongside the first shot. This creates the dual-material structure in a single step. The thermal interface between both shots bonds them together—no glue, no screws, just process control.
Done right, this cycle repeats every few seconds. The part comes out fully formed—ready to pack, no post-processing needed.
Common Material Pairings in Two-Shot Molding
The most critical aspect of two-shot molding material selection is ensuring melt temperature compatibility and chemical bonding affinity between the two resins. These combinations must allow for thermal bonding or adhesion during the cycle, otherwise delamination or poor bonding will occur.
| First Material (Substrate) | Second Material (Top Layer) | Application Examples |
|---|---|---|
| PC (Polycarbonate) | TPE (Thermoplastic Elastomer) | Buttons, grips, wearables |
| ABS | PMMA | Light guides, aesthetic panels |
| PA66 | PA6 | Automotive connectors, brackets |
| PP (Polypropylene) | TPE | Seals, consumer product housings |
| PC | PC (different color) | Transparent dual-tone optical parts |
Engineer’s Tip:
Always verify adhesion through peel and shear tests. Even compatible materials may behave differently under varying mold temperatures or surface finishes. Speak with your material supplier about adhesion modifiers or pre-treatments if bonding is inconsistent.
Design Considerations for Two-Shot Molded Parts
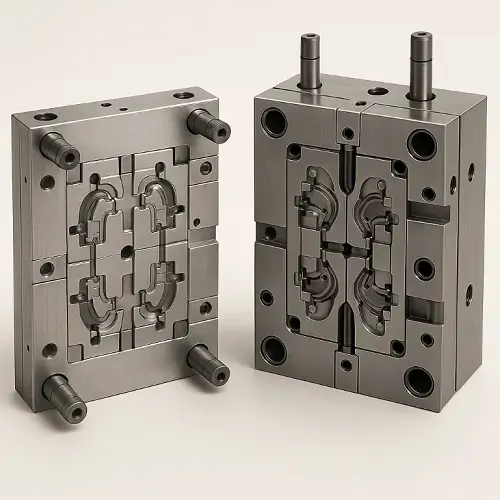
Designing for two-shot molding isn’t just about adding a second cavity—it’s about understanding how two different resins behave together in a single mold environment. Here’s what typically separates a clean part from a reject bin failure:
Shut-Off Design
The shut-off between first and second shots needs more than just “good contact”—it needs steel-on-steel precision. We’ve seen cases where flash occurred not because of pressure, but due to uneven polish or unvented corners. If the shut-off relies on parting-line pressure alone, it won’t hold up under second-shot injection.
Engineer’s Tip: Always add positive shut-off features—at least 3° shut-off angles and hard contact flats. Avoid relying on “freeze-off” as a seal.
Draft Angles
Draft gets tricky when one shot ejects forward and the second ejects backward. Without bidirectional draft planning, you’ll end up with parts stuck in the cavity or cosmetic damage during ejection. Collapsible cores or lifters are often necessary.
Wall Thickness Control
Two-shot parts amplify thickness issues. If the first shot is thin and the second shot is thick, expect warpage. If reverse, sink marks and cooling imbalance are common. Even worse—differential shrink can cause internal stress.
Engineer’s Tip: Try to keep both shots within ±10% wall thickness tolerance. And don’t forget to tune your cooling circuits for both layers independently.
Flow Behavior
The second material often follows unpredictable paths, especially if the first shot has tight ribs or curved geometry. Gate placement becomes critical—not just for fill, but for bond quality and cosmetic surface flow. Avoid second-shot gates pointing directly at shut-offs or undercuts.
Color Bleed & Interface Control
In two-color applications, color bleed is real—especially when dark pigments are shot over lighter bases. The solution isn’t just materials—it’s geometry. Add stepped barriers or shear traps in the cavity to block pigment creep.
Two-Shot Molding vs. Overmolding: What’s the Real Difference?
Though both combine materials, two-shot injection molding and overmolding differ in how they achieve the outcome.
| Aspect | Two-Shot Molding | Overmolding |
|---|---|---|
| Process Type | Integrated dual-shot in same machine | Multi-step, may involve multiple machines |
| Adhesion Method | Thermal/chemical fusion | Often mechanical interlock or partial bond |
| Setup Cost | High (complex tool, dual-barrel press) | Lower (single-barrel machine with sequence) |
| Part-to-Part Consistency | Excellent registration and repeatability | Lower precision, more variation |
| Cycle Time | Faster per part (once set up) | Longer due to handling |
| Volume Suitability | Mid to high volumes (10k+) | Low to mid volumes, prototyping |
When to Choose Two-Shot
You need high alignment accuracy, color clarity, or production volume exceeds 10,000 units.
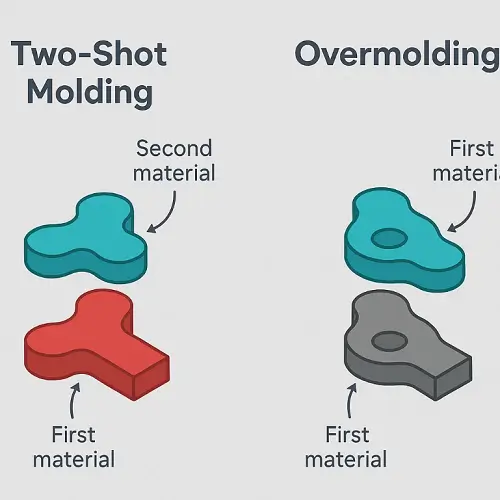
When to Choose Overmolding
You’re in prototype stage, working with inserts, or using substrates not compatible with two-shot machines.
Where Two-Shot Molding Excels: Industry Applications
Two-shot injection molding is used where form and function must co-exist—especially in parts that require ergonomics, aesthetics, and part consolidation.
-
Automotive: Multi-color control knobs, backlit dashboard buttons, vibration-damping handles
-
Medical: TPE-over-PC syringe plungers, handheld device shells
-
Consumer Goods: Dual-tone toothbrush handles, wearables with skin-safe silicone
-
Electronics: Dual-shot buttons, game controller grips
-
Industrial Tools: Ruggedized housings, soft-touch zones on power tools
Engineering Tip: Managing Flow Front Alignment
In two-color molding, especially with translucent materials, misaligned flow fronts from the two shots can create visible seam lines. Use mold flow simulation during DFM to detect pressure differentials and align cooling circuits.
Is Two-Shot Molding Right for Your Project?
Use the following checklist to decide:
✅ Do you require strong, permanent adhesion between two plastic components?
✅ Will a consolidated part reduce assembly cost or failure points?
✅ Is the required quantity above 10,000 units per year?
✅ Does part design demand tight dimensional alignment between layers?
✅ Do you have budget for high tooling investment?
If you answered yes to at least three of these, then two-shot molding is likely the best option.
Frequently Asked Questions
Can you use metal inserts in two-shot molding?
No. Metal insert placement typically requires insert molding or overmolding, not true two-shot.
Are LSR (liquid silicone rubber) materials compatible?
Generally not. Standard two-shot machines don’t support LSR. Specialized cold-runner tooling and dosing units are needed.
Can both materials be the same type but different colors?
Yes. That’s common for parts requiring color segmentation without introducing new material behavior.
What’s the average tooling lead time?
Two-shot molds take longer—8–12 weeks on average—due to added complexity like rotating cores and multiple shut-offs.
Does Jeek offer two-shot mold flow analysis?
Yes. Every two-shot mold is simulated before steel cut, including temperature control, gate balance, and adhesion tests.
Final Recommendations from Jeek Engineers
Two-shot injection molding is not just a visual upgrade—it’s a manufacturing strategy that reduces part count, ensures material synergy, and enables sleek, functional products that stand out in crowded markets.
But it’s not always the right choice. For low runs or highly specialized materials, simpler processes like overmolding or insert molding may prove more economical.
Before committing tooling budget, consult engineers who understand mold kinematics, thermal control, and adhesion chemistry. Jeek’s tooling engineers bring over a decade of two-shot experience to every project—across industries from aerospace to wearables.
Ready to Start Your Two-Shot Molding Project?
If you’re considering two-shot injection molding for your next product, let Jeek’s engineers help you get it right from the start. We’ll review your CAD files, evaluate resin compatibility, and recommend the most practical mold layout based on your design goals and production volume.
📩Upload your files today and get a detailed manufacturability report within 24 hours—no commitment, just clear guidance from experts who understand the process inside out.