
Injection mold maintenance is not just a quick wipe after production. A mold has cavities, cores, vents, gates, runners, cooling channels, ejector pins, slides, lifters, guide components, seals, shutoffs, and parting line surfaces. Each cycle adds heat, pressure, plastic flow, gas residue, clamping force, and mechanical movement to those areas.
When the mold is maintained properly, parts release cleaner, vents stay open, cooling stays stable, and production problems are easier to control. When maintenance is ignored, small issues usually show up first: flash at the parting line, burn marks near trapped air, sticking parts, blocked vents, worn gates, ejector pin marks, longer cooling time, or dimensions drifting out of tolerance.
For customers and engineers, mold maintenance affects more than tool life. It affects molded part quality, delivery stability, scrap rate, repair cost, and whether a mold can return to production quickly after storage.
A good maintenance plan is not complicated, but it has to be consistent. The mold should be cleaned, inspected, lubricated, dried, protected, and recorded based on the material, cycle count, mold structure, and part quality requirements.
How to Maintain an Injection Mold?
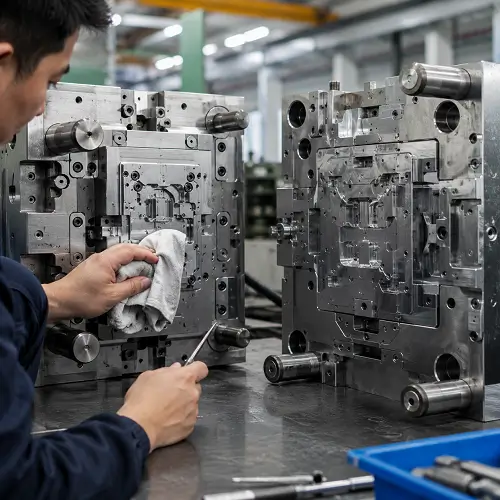
To maintain an injection mold, clean the cavity, core, runner, sprue, gate, vents, and parting line after production. Check ejector pins, slides, lifters, guide pins, bushings, cooling channels, water fittings, hot runner parts, and shutoff surfaces. Lubricate moving components, remove plastic residue, dry the mold, apply rust protection, and record cycle count, defects, repairs, and parts replaced.
A mold running standard PP may only need basic cleaning and inspection after short runs. A mold running glass-filled nylon, flame-retardant resin, cosmetic parts, hot runners, slides, lifters, or tight shutoffs needs more frequent maintenance.
Good mold maintenance prevents flash, burn marks, short shots, sticking parts, ejector marks, surface defects, water leaks, cooling problems, dimensional drift, and unexpected production downtime.
Key Injection Mold Maintenance Tasks
A practical injection mold maintenance plan should cover the areas that actually create molding problems.
- Clean cavity, core, runner, sprue, and gate areas after production.
- Clear vents to prevent gas traps, burn marks, and short shots.
- Check ejector pins, sleeves, return pins, and ejector plate movement.
- Lubricate slides, lifters, guide pins, bushings, and moving mold components.
- Inspect parting lines and shutoff areas for wear, dents, burrs, or plastic buildup.
- Check cooling channels, water fittings, hoses, O-rings, and possible leaks.
- Inspect hot runner heaters, thermocouples, tips, wiring, and leakage if the mold uses a hot runner system.
- Dry the mold and apply rust protection before storage.
- Record cycle count, resin used, defects found, repairs made, and next maintenance needs.
These tasks look basic, but they prevent many common defects. A blocked vent can create burn marks. A worn shutoff can create flash. A sticking ejector pin can mark the part. A dirty cooling channel can increase cooling time and shift part dimensions.
Why Injection Mold Maintenance Matters
A mold usually does not fail in one shot. Most problems start quietly. A vent begins to clog. A gate starts to wear. A slide moves a little rougher. A cooling channel loses flow. An ejector pin starts to stick. The mold may still run, but the process window becomes weaker.
That is where maintenance matters. It catches small issues before they turn into damaged steel, rejected parts, or emergency downtime.
A blocked vent can cause burn marks or short shots. A worn parting line can create flash. A dirty cavity can damage the molded surface. A sticking ejector pin can mark or bend the part. A scaled cooling channel can increase cooling time and cause dimensional drift.
Planned maintenance is almost always cheaper than stopping production to repair a mold that should have been cleaned or inspected earlier.
Types of Injection Mold Maintenance
Injection mold maintenance is usually handled in four levels: routine maintenance, preventive maintenance, corrective maintenance, and storage maintenance.
Routine Maintenance
Routine maintenance is done during production or immediately after a run. It includes quick cleaning, visible inspection, checking for residue, removing plastic buildup, wiping parting line areas, checking vents, and confirming that ejector and moving components behave normally.
This work does not take much time, but skipping it can be expensive. A small piece of plastic left on the parting line can dent the mold when the tool closes. Resin buildup around vents can cause burns. Dry slides can wear faster with every cycle.
Preventive Maintenance
Preventive maintenance is scheduled before serious problems appear. It may be based on cycle count, production hours, resin type, mold complexity, or previous maintenance records.
This level usually includes deeper cleaning, vent inspection, slide and lifter lubrication, ejector system inspection, cooling line checks, guide component checks, hot runner inspection, and review of worn areas.
A simple two-plate mold running standard PP does not need the same maintenance interval as a hot runner mold running glass-filled nylon with slides and lifters. The maintenance plan should match the mold, not just the calendar.
Corrective Maintenance
Corrective maintenance happens after the mold shows a problem. This may include replacing ejector pins, polishing damaged cavity surfaces, repairing worn shutoffs, cleaning blocked cooling lines, replacing seals, fixing water leaks, repairing slides, or correcting parting line damage.
Some corrective work is normal over a mold’s service life. The real problem is emergency repair that interrupts production because small signs were missed earlier.
Storage Maintenance
Storage maintenance protects the mold after production ends. The mold should be cleaned, dried, protected against rust, and stored with clear notes about its last production condition.
Poor storage can damage a mold that was in good condition after the last run. Moisture creates rust. Residue hardens. Cooling lines trap water. The next production run may start with repair instead of molding parts.
Injection Mold Maintenance Checklist
A checklist keeps maintenance work consistent. The exact list depends on the mold design and resin, but these areas should be checked on most injection molds.
| Mold Area | What to Check | Problem Prevented |
|---|---|---|
| Cavity and core | Scratches, rust, residue, polish damage | Surface defects, sticking, cosmetic issues |
| Parting line | Plastic buildup, dents, wear, mismatch | Flash, mold damage, poor sealing |
| Vents | Blockage, residue, damage | Burn marks, short shots, gas traps |
| Gates and runners | Wear, blockage, buildup, burrs | Filling variation, gate defects, weight drift |
| Sprue bushing | Stuck resin, wear, damage, nozzle contact marks | Leakage, poor material transfer, sticking |
| Ejector pins | Sticking, bending, wear, pin marks | Poor release, part deformation, ejector marks |
| Slides and lifters | Lubrication, wear, smooth movement | Flash, galling, broken moving parts |
| Cooling channels | Scale, rust, leakage, low flow | Long cooling time, warpage, dimensional drift |
| Guide pins and bushings | Wear, lubrication, alignment | Mismatch, uneven wear, mold damage |
| Hot runner system | Heater function, leakage, tip condition | Gate defects, degradation, downtime |
| Water fittings and hoses | Leakage, thread damage, deposits | Cooling instability, water leaks |
| Mold exterior | Rust, clamp marks, plate damage | Setup issues, storage damage |
| Maintenance record | Cycle count, issues, repairs | Better planning, fewer repeat defects |
A checklist should not be treated as paperwork. If the same mold repeatedly develops blocked vents, sticking pins, or flash in the same area, the maintenance plan should be adjusted.
Maintenance Before Production Starts
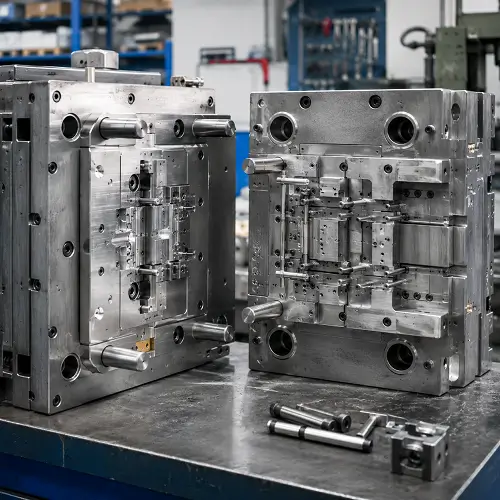
A mold should be checked before the press starts full production, especially if the mold has been stored, moved, repaired, or changed to a different resin.
The mold surface should be clean and free from dust, rust preventive, old resin, loose plastic, and foreign material. The parting line should be checked for trapped debris. Gates, runners, sprues, and vents should be open. Cooling lines should be connected properly and checked for leaks. Ejector movement should be tested before running at full speed.
For molds with slides or lifters, movement should be smooth before cycling under full clamp force. If a slide does not return correctly, the mold can be damaged during closing.
A short pre-run inspection can prevent a much larger repair.
Maintenance After Each Production Run
After production, the mold should be cleaned while the condition is still easy to inspect. Resin residue, gas deposits, and buildup should be removed from the cavity, core, vents, gates, runners, sprue, and parting line areas.
The last molded parts should also be reviewed. Flash may point to parting line or shutoff wear. Burn marks may point to blocked vents. Strong ejector marks may point to sticking or ejector imbalance. Surface defects may point to cavity contamination, scratches, or poor cleaning.
After cleaning, the mold should be dried and protected if it will not go directly back into production. Moisture left inside the mold or cooling channels can create rust before the next run.
Core and Cavity Cleaning
The core and cavity form the plastic part, so cleaning these surfaces requires care. The goal is to remove residue without damaging the molding surface.
Polished cavities, textured surfaces, and EDM surfaces should not be cleaned the same way. A polished cosmetic cavity can be damaged by rough tools or aggressive wiping. A textured surface can trap residue in small grooves. Deep ribs and bosses can collect gas deposits or degraded material.
The cleaning method depends on the surface finish, resin, residue, and mold requirement. Lint-free wipes, approved solvents, soft tools, dry ice cleaning, ultrasonic cleaning, or bench cleaning may be used depending on the situation.
Poor cleaning can create more damage than the residue itself. A scratch on a cosmetic cavity can transfer directly to the plastic part.
Vent Cleaning
Vents are small, but they control a large part of molding stability. They allow trapped air and gas to leave the cavity during filling.
When vents clog, the mold may produce burn marks, short shots, gas traps, weak weld lines, or poor surface finish. This often happens near end-of-fill areas, thin ribs, bosses, deep pockets, and tight shutoffs.
Vent cleaning should remove residue without changing vent depth. Opening a vent too much can create flash. Leaving a vent blocked can create burns or incomplete filling.
Materials with additives, flame retardants, or higher gas release usually require more frequent vent maintenance.
Gate, Runner, and Sprue Maintenance
Gates, runners, and sprues guide molten plastic into the cavity. These areas see heat, pressure, shear, and repeated material flow.
The gate is often one of the first areas to show wear, especially with abrasive materials. A worn gate can change part weight, filling behavior, holding pressure response, gate vestige, and appearance.
Runners and sprues should be checked for buildup, scratches, burrs, rough surfaces, and stuck plastic. Scratches made while removing stuck material can make future sticking worse.
For multi-cavity molds, gate and runner condition must stay balanced. If one gate wears faster than another, cavities may fill differently and part variation may increase.
Ejector System Maintenance
The ejector system releases the molded part after cooling. Ejector pins, sleeves, blades, return pins, ejector plates, and stripper plates all need smooth movement.
Common ejector problems include sticking pins, bent pins, worn pins, damaged sleeves, poor return action, resin buildup, and uneven ejection force. These problems can leave pin marks, distort the part, increase cycle time, or cause parts to stay on the core.
Maintenance should check whether the ejector system moves freely and returns properly. Pins should be inspected for wear and alignment. If ejector marks become stronger over time, the mold condition should be checked before blaming only machine settings.
Slide and Lifter Maintenance
Slides and lifters need more maintenance than fixed mold areas because they move every cycle. They also form undercuts, side holes, clips, grooves, and internal features, so wear in these areas affects both part quality and mold safety.
Slides should move smoothly, lock correctly, and return fully. Lifters should move without binding. Wear plates, angle pins, guide blocks, locking blocks, and contact surfaces should be lubricated and inspected.
Poor slide or lifter maintenance can cause flash, rough movement, galling, broken components, or mold damage during closing. A side-action mold should never be maintained like a simple two-plate mold.
Cooling Channel Maintenance
Cooling channels affect cycle time, shrinkage, warpage, and dimensional repeatability. Scale, rust, mineral deposits, and blocked passages reduce water flow and heat transfer.
A mold with dirty cooling channels may need longer cooling time to produce the same part. The molded part may start to warp or drift dimensionally even though machine settings have not changed.
Cooling maintenance should include checking water flow, connectors, hoses, fittings, leaks, scale, and temperature control. If needed, cooling channels should be flushed or cleaned.
Cooling problems are often gradual, so they are easy to miss until cycle time or part quality changes.
Parting Line and Shutoff Maintenance
The parting line seals the mold halves. Shutoff surfaces form holes, slots, clips, side features, and sealing areas. These surfaces must stay clean and accurate.
Parting line damage or buildup can cause flash. Shutoff wear can create flash, mismatch, or dimensional problems. Trapped plastic at the parting line can dent the mold when the tool closes.
Maintenance should remove plastic buildup carefully, inspect contact surfaces, check for dents or burrs, and avoid damaging sealing areas during cleaning.
If flash appears suddenly, check for contamination, parting line damage, clamp issues, and shutoff wear before pushing process settings too far.
Hot Runner Maintenance
Hot runner molds need additional maintenance because the system contains heaters, thermocouples, manifolds, nozzles, hot tips, valve gates, wiring, seals, and temperature control zones.
Hot runner problems may show up as gate defects, drooling, stringing, color streaks, material degradation, unbalanced filling, heater failure, or leakage.
Maintenance should check heater function, thermocouple readings, wiring condition, tip wear, valve gate movement, manifold leakage, and material buildup.
Color changes and heat-sensitive materials need careful purging. Old material trapped in hot runner areas can degrade and contaminate later production.
Hardware, Water Fittings, and Mold Plates
Mold hardware should not be ignored. Bolts, clamps, water fittings, pipe threads, O-rings, seals, and platen contact surfaces affect setup and production stability.
Loose or damaged hardware can create leaks, poor alignment, setup problems, or tool damage. Cooling fittings should be checked for leaks and buildup. O-rings and seals should be replaced when worn or damaged.
Mold plates should be checked for rust, dents, burrs, and clamp damage. Small burrs on mounting or contact surfaces can affect mold fit and alignment.
Drying and Rust Prevention
Moisture can damage a mold quickly during storage. A mold should be dry before storage, especially around cooling channels, small pockets, guide areas, and moving components.
Compressed air can help remove water from surfaces and passages. In some cases, heating or longer drying time may be needed. Rust preventive should be applied correctly after cleaning and drying.
Rust on a cavity surface can damage molded part appearance. Rust in cooling channels can reduce flow. Rust on guide components can affect alignment and movement.
Storage maintenance is part of mold maintenance. A mold that sits for months without protection may need repair before the next production run.
Injection Mold Repair Signs
Maintenance keeps a mold running. Repair becomes necessary when wear or damage has already affected mold function or part quality.
Flash Formation
Flash on molded parts may mean the parting line, shutoff surfaces, slide fits, or mold alignment has worn or been damaged. It can also relate to clamp force or process pressure, but mold condition should be checked.
If flash keeps returning in the same area, the mold may need repair rather than more process adjustment.
Surface Imperfections
Scratches, dents, dull areas, rust marks, stains, or uneven surface finish on molded parts may come from cavity damage or contamination.
Some surface issues can be corrected with cleaning or polishing. Deeper damage may require welding, polishing, re-machining, or insert replacement.
Ejector Pin Problems
Sticking parts, stronger ejector marks, bent pins, delayed ejection, or uneven release can point to ejector system wear or damage.
Repair may include replacing pins, polishing pin holes, checking ejector plates, or correcting alignment.
Dimensional Drift
When molded parts gradually move out of tolerance, mold wear should be considered. Core wear, cavity wear, shutoff wear, guide wear, or cooling changes can all affect dimensions.
Dimensional drift should not always be treated as a machine setting problem. The mold may need inspection.
Longer Cycle Time
If the mold needs more cooling time than before, cooling channels may be restricted or heat transfer may have changed. Mechanical sticking can also increase cycle time.
Longer cycle time is not just a production cost issue. It can be a sign that mold maintenance is overdue.
Repair or Replace the Mold?
Not every mold problem means the tool must be replaced. Many problems can be repaired with polishing, component replacement, welding, surface grinding, insert replacement, vent repair, ejector repair, or cooling channel cleaning.
Repair usually makes sense when the damage is local, the mold base is still stable, the expected production volume justifies repair, and the repair can restore part quality.
Replacement becomes more realistic when the mold has severe wear, repeated repairs, major alignment problems, cracked steel, poor original design, or repair costs that approach the value of a new tool.
The decision should consider part quality, downtime, repair cost, remaining production volume, and whether the current mold design still matches the project.
Injection Mold Maintenance Record
A maintenance record helps track mold condition over time. Without records, the same defect may repeat without anyone recognizing the pattern.
A useful record should include production date, cycle count, resin used, defects observed, cleaning performed, repairs made, components replaced, cooling issues, vent condition, and next action required.
| Record Item | Why It Matters |
|---|---|
| Production date | Helps track when the mold last ran |
| Cycle count | Shows how much the mold has been used |
| Resin used | Connects residue, wear, or corrosion to material type |
| Defects observed | Tracks repeated flash, burns, sticking, or drift |
| Maintenance performed | Shows cleaning, lubrication, inspection, and repair history |
| Components replaced | Tracks ejector pins, inserts, seals, wear plates, or hot runner parts |
| Cooling condition | Helps identify water flow or scale problems |
| Next action required | Helps plan repair before the next production run |
Records are especially important for production molds, multi-cavity molds, hot runner molds, and molds running abrasive materials. A good maintenance record helps the team predict problems before they interrupt production.
How JeekMould Reviews Mold Maintenance Risks Before Tooling
JeekMould reviews maintenance risks before tooling by looking at part geometry, material, expected volume, mold structure, surface requirements, tolerance needs, and high-wear areas.
A simple open-and-shut mold may need a basic maintenance plan. A mold with slides, lifters, hot runners, tight shutoffs, deep ribs, or abrasive resin needs more planning. Maintenance access matters. If a vent is hard to clean, if a slide wear surface is poorly protected, or if a gate area cannot be replaced easily, the mold may become harder to maintain later.
For production molds, JeekMould may recommend replaceable inserts, wear-resistant steel in local areas, better cooling access, guided ejection, venting improvements, or a stronger maintenance plan before mold manufacturing begins.
If your project needs injection mold making services or molded plastic part production, Upload your CAD files for DFM feedback, mold maintenance risk review, and an injection molding quotation.
FAQs
How do you maintain an injection mold?
Maintain an injection mold by cleaning the cavity, core, runner, sprue, gate, vents, and parting line; checking ejector pins, slides, lifters, cooling channels, hot runner parts, and water fittings; lubricating moving components; drying the mold; applying rust protection; and recording maintenance history.
What should be included in an injection mold maintenance checklist?
A mold maintenance checklist should include cavities, cores, parting lines, vents, gates, runners, sprues, ejector pins, slides, lifters, cooling channels, guide pins, bushings, hot runner components, water fittings, rust prevention, and maintenance records.
How often should injection molds be maintained?
Maintenance frequency depends on resin type, cycle count, mold complexity, production volume, and part quality requirements. Abrasive materials, hot runners, slides, lifters, and cosmetic cavities usually require more frequent maintenance.
Why do injection mold vents need cleaning?
Vents remove trapped air and gas during filling. If vents are blocked, the mold may produce burn marks, short shots, weak weld lines, gas traps, or poor surface finish.
What are signs that an injection mold needs repair?
Common signs include flash, surface defects, ejector pin problems, dimensional drift, longer cycle time, sticking parts, rough slide movement, water leaks, and repeated defects in the same area.
Can mold maintenance extend injection mold life?
Yes. Regular maintenance can extend mold life by reducing wear, keeping vents clean, protecting cavity surfaces, maintaining cooling flow, lubricating moving components, and finding small problems before they become major repairs.
Conclusion
Injection mold maintenance should focus on keeping the mold clean, dry, aligned, lubricated, cooled, vented, and protected. The areas that usually matter most are parting lines, vents, gates, runners, sprues, ejector pins, slides, lifters, cooling channels, hot runner parts, cavity surfaces, and water fittings.
Maintenance is different from repair, but the two are connected. Good maintenance reduces the need for emergency repair. When repair is needed, early signs such as flash, sticking, surface defects, dimensional drift, and longer cycle time help identify the problem before production losses become worse.
For customers, mold maintenance is not just a shop-floor task. It affects part quality, cycle time, mold life, delivery stability, and total production cost. A mold that is easy to maintain is usually easier to keep stable in production.
JeekMould can review mold structure, resin, part geometry, expected volume, and high-wear areas before tooling begins. Upload your CAD files for DFM feedback, mold maintenance risk review, and an injection molding quotation.